
Key Takeaways:
- Sixty percent of consumers are more likely to contact a business with images in local search results — your photo is doing the selling before the call happens.
- Businesses upgrading from smartphone photos to professional photography see a 40–80% increase in booking inquiries and can support 15–25% higher rental pricing.
- Golden hour light — one hour after sunrise or before sunset — is the single best time to photograph inflatables for marketing use.
- A $1,250 professional photography investment typically breaks even within three months and returns approximately $23,950 net in the first year.
- A repeatable shot list, consistent export settings, and SEO-friendly file naming turn one good shot into a full marketing library that works across every platform.
Your equipment is only as sellable as the photos representing it. Most rental operators invest thousands in commercial-grade inflatables like heavy-duty blow up obstacle courses and then photograph them with a phone in bad light against a cluttered background. The result is a listing that looks cheap regardless of what the unit actually costs. This guide covers everything you need to shoot, stage, and deploy photos that justify premium pricing and convert browsers into bookings.
Why Do Better Setup Photos Let You Charge Premium Pricing?
Better photos do more than show your equipment. They signal value before a single word is read. Customers form their first impression in seconds. That impression sets the price they're willing to pay.
Why Do Customers Judge Safety and Cleanliness From Photos First?
Parents don't call to ask about safety. They look at your photos and decide. If the setup looks clean, organized, and professional, they assume the operation is too. Sixty percent of consumers are more likely to contact a business that has images in local search results. The photo is doing the vetting before the phone ever rings.
How Do Good Photos Reduce Price Shopping and "What's Your Cheapest?" Messages?
Price shoppers show up when photos don't communicate value. Seventy-six percent of "near me" searchers visit a business within a day of searching — the photo is doing the selling before the call happens. Businesses with professional photography report that customers don't negotiate prices. They just book.
What Makes One Setup Look "Premium" Compared to Another?
It's rarely the equipment. The difference between a $175 rental and a $250 rental is often entirely a matter of presentation. A manicured lawn, clean inflatable, and intentional framing tell a story that a driveway snapshot cannot. Bounce houses photographed with care command higher rates than identical units shot carelessly.
What Makes an Inflatable Setup Photo Look Professional Instead of "Phone Snapshot"?
Three things separate professional-looking photos from snapshots: light, angle, and clean framing. Nail all three and even a mid-range camera produces marketing-grade results.
What Lighting and Time of Day Make Inflatables Look Their Best?
Shoot during golden hour — one hour after sunrise or one hour before sunset. At this time, color temperature runs approximately 3,000–4,000K. That naturally brings out the reds, yellows, and oranges in most inflatable designs. Shadows go long and soft, not harsh and distracting.
Overcast days are the second-best option. Clouds act as a giant natural softbox — no harsh shadows, no blown-out highlights. This is ideal for detail shots and color-accurate product images. Blue hour, 20–40 minutes after sunset, works for dramatic twilight shots but requires a tripod.
What Angles Make Slides and Bounce Houses Look Bigger Without Misleading People?
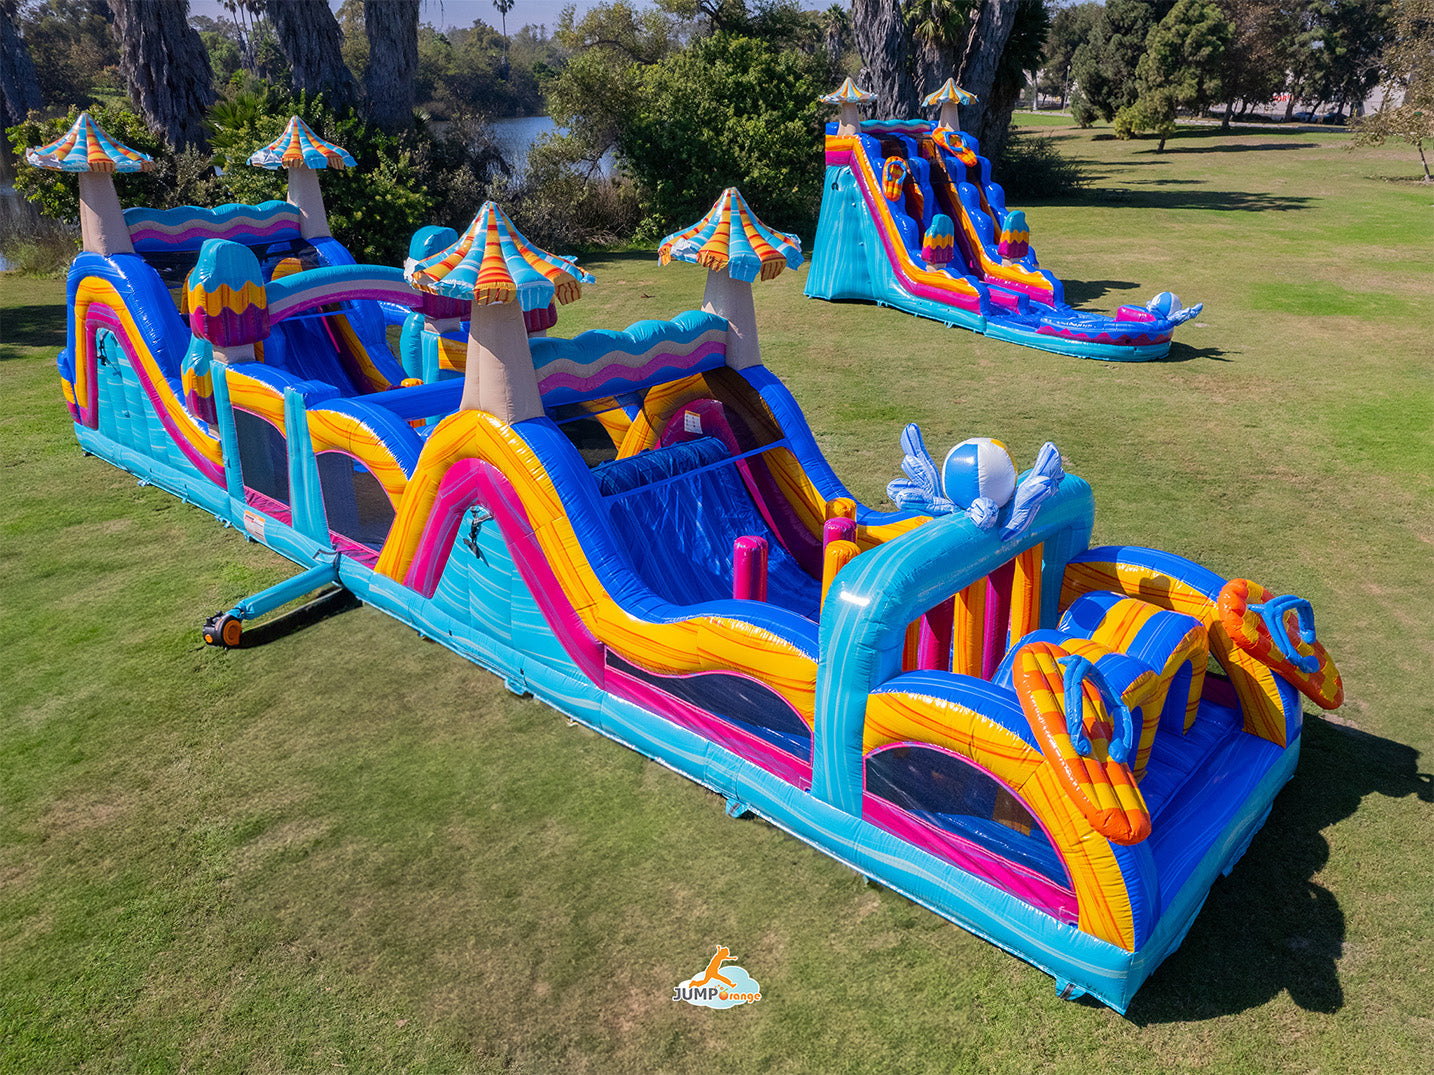
Shoot from knee height or lower with a wide-angle lens in the 16–35mm range. That position makes inflatables look larger and more impressive. This is honest — the units are big. The angle just shows it properly. If you offer commercial water slides, aerial shots are especially powerful for showing height and full footprint.
Drone photography at 50–100 feet elevation shows the setup in full context — yard integration, event scale, and surrounding environment. Commercial drone use requires FAA Part 107 certification in the United States. The exam costs approximately $175, requires 20–30 hours of study, and is valid for 24 months.
How Do You Keep Backgrounds Clean So Your Unit Stands Out?
Background clutter kills a premium photo fast. Power lines, chain-link fences, old vehicles, trash cans, and patchy lawns all drag the frame down. Scan your full shooting angle before you set up, not after. Walk the perimeter. Remove or reframe around anything that looks off.
What Details Should You Include to Show Scale Without Clutter?
One adult standing next to the unit is the cleanest scale reference. It communicates size instantly without adding visual noise. Keep one person, clearly positioned, and keep everything else out of the frame.
What Specific Setup Shots Should Every Rental Listing Have?
A complete unit listing needs a minimum set of shots. Without them, customers are left guessing — and they book the business that doesn't make them guess.
What "Hero Shot" Should Be Your First Photo on Every Unit?
The hero shot is your low-angle, wide-angle front view. Unit fully inflated. Sky as backdrop. Shot during golden hour. This is the image that stops the scroll. Websites with professional photography receive 94% more views than those without. Your hero shot is doing most of that work. Export it at a minimum of 2,400 × 1,600 pixels for crisp web rendering.
What Close-Up Photos Prove Condition, Quality, and Cleanliness?
Close-ups build trust where words fall short. Photograph the stitching and seams (shows durability), safety netting (reassures parents), artwork and graphics (shows visual appeal), clean interior surfaces (shows hygiene), and entry and exit points (shows ease of use). Always wipe every exterior surface with a microfiber cloth first. The inflatable must be fully inflated for at least 15–20 minutes before any photography begins.
What Safety and Anchoring Photos Increase Parent Confidence?
Parents want to see stakes in the ground. They want to see a taut, properly anchored setup. Show it. A clean shot of the anchoring at each corner — done neatly and fully seated — communicates professionalism without a word of copy. It's one of the highest-trust signals you can send to a booking parent.
What "Fun in Use" Photos Work Without Showing Faces or Privacy Issues?
Action shots add energy no static photo can match. Use burst mode at 8–12 fps with continuous autofocus (AI Servo on Canon; AF-C on Nikon/Sony). Set shutter speed to 1/500s minimum — 1/1000s for fast slides and jumps. For any photo featuring an identifiable person, a signed model release is legally required. For minors, a parent or legal guardian must sign. Collect releases before the shoot starts, never after.
What Common Photography Mistakes Make Great Equipment Look Cheap?
Good equipment photographed poorly loses bookings to inferior equipment photographed well. These are the mistakes that cost you the most.
Why Do Crooked Horizons and Bad Crops Kill Trust Fast?
A crooked horizon signals sloppiness. That association transfers directly to your business. Level the camera every time. Crop to the correct platform ratio — don't let automated resizing cut off the top of a unit or leave dead space at the bottom. Small composition errors communicate a lack of attention to detail, and customers notice.
What Background Items Make Customers Think "This Looks Sketchy"?
Visible power lines, chain-link fencing, deteriorating structures, overgrown or patchy lawn, trash cans, older parked vehicles, and neighboring clutter all undermine premium pricing. You don't need a mansion in the background. You need a neutral, clean setting that lets the inflatable be the subject.
Why Do Dark, Flashy, or Over-Edited Photos Backfire?
Over-editing destroys trust. Heavily filtered or oversaturated photos make customers suspicious of what the unit actually looks like in person. Boost Vibrance, not Saturation. Keep the Vibrance slider between +15 and +25 — enhanced but natural. The goal is to present reality at its best, not to fabricate it.
What Should You Avoid When Photographing Wet Units, Wrinkles, and Blower Cords?
Wrinkles mean the unit wasn't fully inflated — always wait at least 15–20 minutes. Wet units signal rushed or poor conditions. Blower cords break immersion instantly. Reschedule if conditions are windy (movement blur, wrinkles, safety risk), rainy (wet inflatables, safety risk), or midday harsh sun (blown-out highlights). Fix problems before the shutter opens, not in editing.
How Should You Stage a Setup So It Photographs Like a Premium Experience?
Staging is the fastest way to add perceived value without spending a dollar on new equipment. A few deliberate decisions before you shoot change everything.
Should You Photograph on Grass, Turf, Driveways, or Indoor Floors?
Grass is the premium backdrop. Water the lawn the evening before for a vibrant green color. Mow 1–2 days ahead — not day-of, to avoid clippings. Background hierarchy from highest to lowest impact: premium residential with pool or professional landscaping, then venue partnerships like country clubs or event centers, then well-maintained public parks, then generic residential. If you're unsure which units photograph best in which settings, 1-on-1 product advice can help match your inventory to the right marketing contexts.
How Do You Hide Cords, Stakes, Tarps, and Sandbags Without Being Dishonest?
Position the blower behind the inflatable, away from your primary shooting angle. Use natural screening — shrubs, hedges, garden features. A simple burlap wrap costs $20–$50 and turns a blower into a neutral background element. If it's still visible, crop it in post-processing. None of this is deceptive. The equipment exists. You're just not centering it in the frame.
What Small Add-Ons Make Photos Look More "Event Ready"?
Props add context and warmth. The highest-impact options: balloon arch or cluster (high impact, low cost), welcome or party sign (medium impact, low cost), and themed decorations for targeted campaigns (high impact, medium cost). Keep props coordinated with the inflatable's colors. Don't let them compete for attention. The inflatable is still the subject.
How Do You Keep Branding Visible Without Making the Photo Look Like an Ad?
Apply a semi-transparent watermark at 30–50% opacity in one corner. Include your business name and website URL. Keep the font and placement consistent across all images. A watermark that's too prominent makes the photo look like an ad. Subtle is more credible.
What Step-by-Step Photography Workflow Helps You Get Premium Shots Every Time?
A repeatable workflow removes guesswork and delivers consistent results across your full inventory.
Step 1: How Do You Pick the Best Location and Background Before Setup?
Scout the location before you show up with equipment. Use a sun-tracking app — PhotoPills or Sun Surveyor — to map sun direction at your planned shoot time. Confirm power lines are out of frame from every primary angle. Check neighboring properties. Evaluate lawn condition. A 15-minute scout visit eliminates most shoot-day problems. For full-scale event setups, the large event inventory gives useful context on what comprehensive multi-unit staging looks like.
Step 2: How Do You Set Up for Clean Lines and Full Inflation?
Pre-shoot checklist: lawn mowed and edged, all clutter removed (toys, tools, hoses, trash cans, vehicles), power cords hidden or routed out of frame, inflatable running for a minimum of 15–20 minutes, all exterior surfaces wiped with a microfiber cloth. Don't start shooting until every item is checked.
Step 3: How Do You Capture the Main Angles in Under 10 Minutes?
Shoot in RAW format — JPEG discards up to 80% of sensor data at capture. For static golden hour shots: f/8 aperture, 1/200s shutter speed, ISO 100–200, Aperture Priority mode. For overcast product shots: f/8–f/11, 1/200s, ISO 100. Hit your 10 essential shots first — establishing wide, low-angle hero, eye-level front, side profile, 3/4 angle, three close-ups, aerial if available, and golden hour beauty shot. A prepared location means this is done in under 10 minutes.
Step 4: How Do You Take Detail Shots That Prove Quality and Safety?
Set f/8–f/11 with 1/250s shutter speed at ISO 100. Use Single autofocus. Get tight enough that the detail fills the frame. Stitching, safety netting, graphics, and clean interior surfaces each get their own shot. These photos do the trust-building your hero shot cannot.
Step 5: How Do You Edit for Brightness and Color Without Looking Fake?
Follow this sequence: correct exposure, set white balance, boost Vibrance +15 to +25, use the HSL panel to increase Saturation and Luminance for the inflatable's primary colors, apply sharpening (Amount 40–60, Radius 1.0–1.5), apply noise reduction if ISO exceeded 400 (Luminance 20–30), then sky replacement if needed. Adobe Lightroom Classic handles this workflow at $10/month. Luminar Neo offers AI-powered sky replacement at $99/year.
Step 6: How Do You Save and Name Photos So They Stay Organized by Unit?
Name every file with an SEO-friendly structure: [unit-name]-[type]-rental-[city].jpg. Example: blue-castle-bounce-house-rental-dallas.jpg. Never leave files named IMG_4521.jpg. Organize by unit type and date. Back up both RAW originals and edited files to an external drive and cloud storage. This system pays off the first time you need to locate a specific unit photo quickly.
How Do You Use Photos Across Your Website and Social Media to Increase Bookings?
The photos you take only work as hard as you deploy them. Placement and consistency matter as much as quality.
Where Should You Place Photos on Product Pages to Increase Conversions?
Lead every product page with your hero shot. Follow with close-ups, then the aerial if you have it. Google Business Profile is equally important — aim for 30+ photos across all six categories: exterior/delivery, products/inventory, team/staff, events/in-action, logo, and cover. The target is 34–54 total images. Export at 1,080 × 1,080px for GBP and 2,400 × 1,600px for website hero images.
How Do You Use Before-and-After Photos to Show Cleanliness and Care?
Shoot the same angle before and after setup. Before: empty yard. After: fully staged inflatable. The transformation answers the unspoken customer question — "what will this actually look like at my event?" It's one of the most effective trust-building content types available to rental operators. Understanding what separates quality commercial equipment from residential units — and why it photographs differently — is covered in this comparison of commercial vs. residential rentals.
What Photo Sets Work Best for Facebook Posts and Neighborhood Groups?
Professional photography lifts social media engagement by approximately 45%. Use a 3-photo set: hero shot, one lifestyle shot, one close-up detail. Square format (1,080 × 1,080px) performs well across platforms. Portrait (1,080 × 1,350px) performs best on mobile. Keep the caption short. Let the photos carry the post.
Should You Build a "Real Setups" Gallery to Build Local Trust?
Yes. Local search click-through rate increases by 60% for businesses with professional imagery in search results. A real setups gallery — actual events, actual yards, actual customers — is credibility your product page photos can't replicate alone. It shows you've done the work. It answers "are they reliable?" before anyone has to ask.
Can You Create a Photo Checklist So Helpers Capture the Same Shots?
Yes, and you should. A written shot list — wide establishing shot, low-angle hero, side profile, 3/4 angle, three close-ups, and a golden hour beauty shot — gives any helper a repeatable framework. Include camera settings. Print it. The goal is consistent results regardless of who's holding the camera.
How Do You Maintain a Consistent Style Across Different Phones?
Use the same export settings for every platform: Instagram square 1,080 × 1,080px, Instagram portrait 1,080 × 1,350px, Facebook feed 1,200 × 630px, GBP 1,080 × 1,080px, website gallery 1,200 × 900px at 75% JPEG quality. Apply consistent Vibrance adjustments, white balance approach, and watermark placement across every image. It reads as a brand, not a collection of random photos.
When Should You Reshoot Units to Match Condition and Branding Updates?
Reshoot when a unit shows visible wear in existing photos, when you rebrand, or when a unit returns from repair looking significantly better. Annual reshoots keep listings accurate. A full inventory shoot runs $500–$2,000. For most businesses, hiring a professional photographer for an annual shoot delivers the best combination of quality and time efficiency.
Are You Ready to Use Photography to Support Premium Pricing Without Constant Discounts?
Better photos aren't a luxury. They're the lowest-cost lever for higher revenue. The math makes it clear.
What Three Photos Should You Replace First to Upgrade Your Listings Fast?
Start with the hero shot on your top three revenue units. These are the listings driving the most traffic. Replace any dark, cluttered, or poorly composed main image with a properly lit, low-angle shot against a clean background. That one change, on three listings, will move the needle faster than any other single improvement.
What Simple Test Shows If Your Photos Are Helping or Hurting Bookings?
Screenshot your listing next to a competitor's. Look at both as a first-time customer. Which one would you call first? If the answer isn't yours, you know what to fix. Businesses upgrading from smartphone photos to professional photography see a 40–80% increase in booking inquiries and can support 15–25% higher rental pricing. The gap between those two outcomes is almost always photography.
How Do You Track Higher Quote Acceptance After Updating Your Photos?
Track your quote-to-booking conversion rate before and after the photo update. The benchmark is clear: at a conservative 20% increase in bookings and a 20% pricing premium on 35 monthly bookings averaging $250, additional monthly revenue runs approximately $2,100. Breakeven on a $1,250 photography investment arrives in approximately three months. The 12-month net return is approximately $23,950 — roughly a 19× return in year one on an investment most business owners keep putting off.
Your Equipment Already Looks Premium — Make Sure Your Photos Say the Same Thing
The units are built to impress. The photography just needs to keep up. Every booking you lose to a competitor with worse equipment but better photos is a problem with a straightforward fix.
JumpOrange through certified commercial-grade inflatable manufacturing produces equipment designed to photograph well, perform reliably, and help you build a rental business worth being proud of. If you're ready to upgrade your inventory to match the quality of your marketing, explore the full lineup and build a fleet that sells itself — starting with the first photo.


Leave a comment
This site is protected by hCaptcha and the hCaptcha Privacy Policy and Terms of Service apply.