Key Takeaways:
- A complete installation runs from site assessment through anchoring, water connection, and a witnessed safety handoff — inflated alone does not mean ready-to-use.
- Anchoring is the single largest time gap in the entire process, with inexperienced operators taking 8 minutes versus 3 minutes for a professional crew, and it is also the highest-consequence step if done incorrectly.
- Quick-seal blower valves alone cut water connection time from 15 minutes to 5 minutes and deliver the single largest efficiency gain of any individual equipment upgrade at 25% setup time reduction.
- Operators using the full post-event protocol of drying, correct folding, and proper storage average 9 years of equipment life compared to 2.5 years for those with no protocol.
- Combining all workflow optimizations produces a 67% total setup time reduction and 2 additional rentals per day, turning installation discipline directly into seasonal revenue.
Your first water slide booking feels like a test. You want to show up, set up fast, look professional, and hand off a safe unit to a client who will call you again. This guide gives you the exact installation sequence that commercial operators follow, the specs that protect your equipment, and the habits that separate a repeat-booking business from a one-time job.
What Is Water Slide Installation and Why Does It Matter for First-Time Rental Operators?
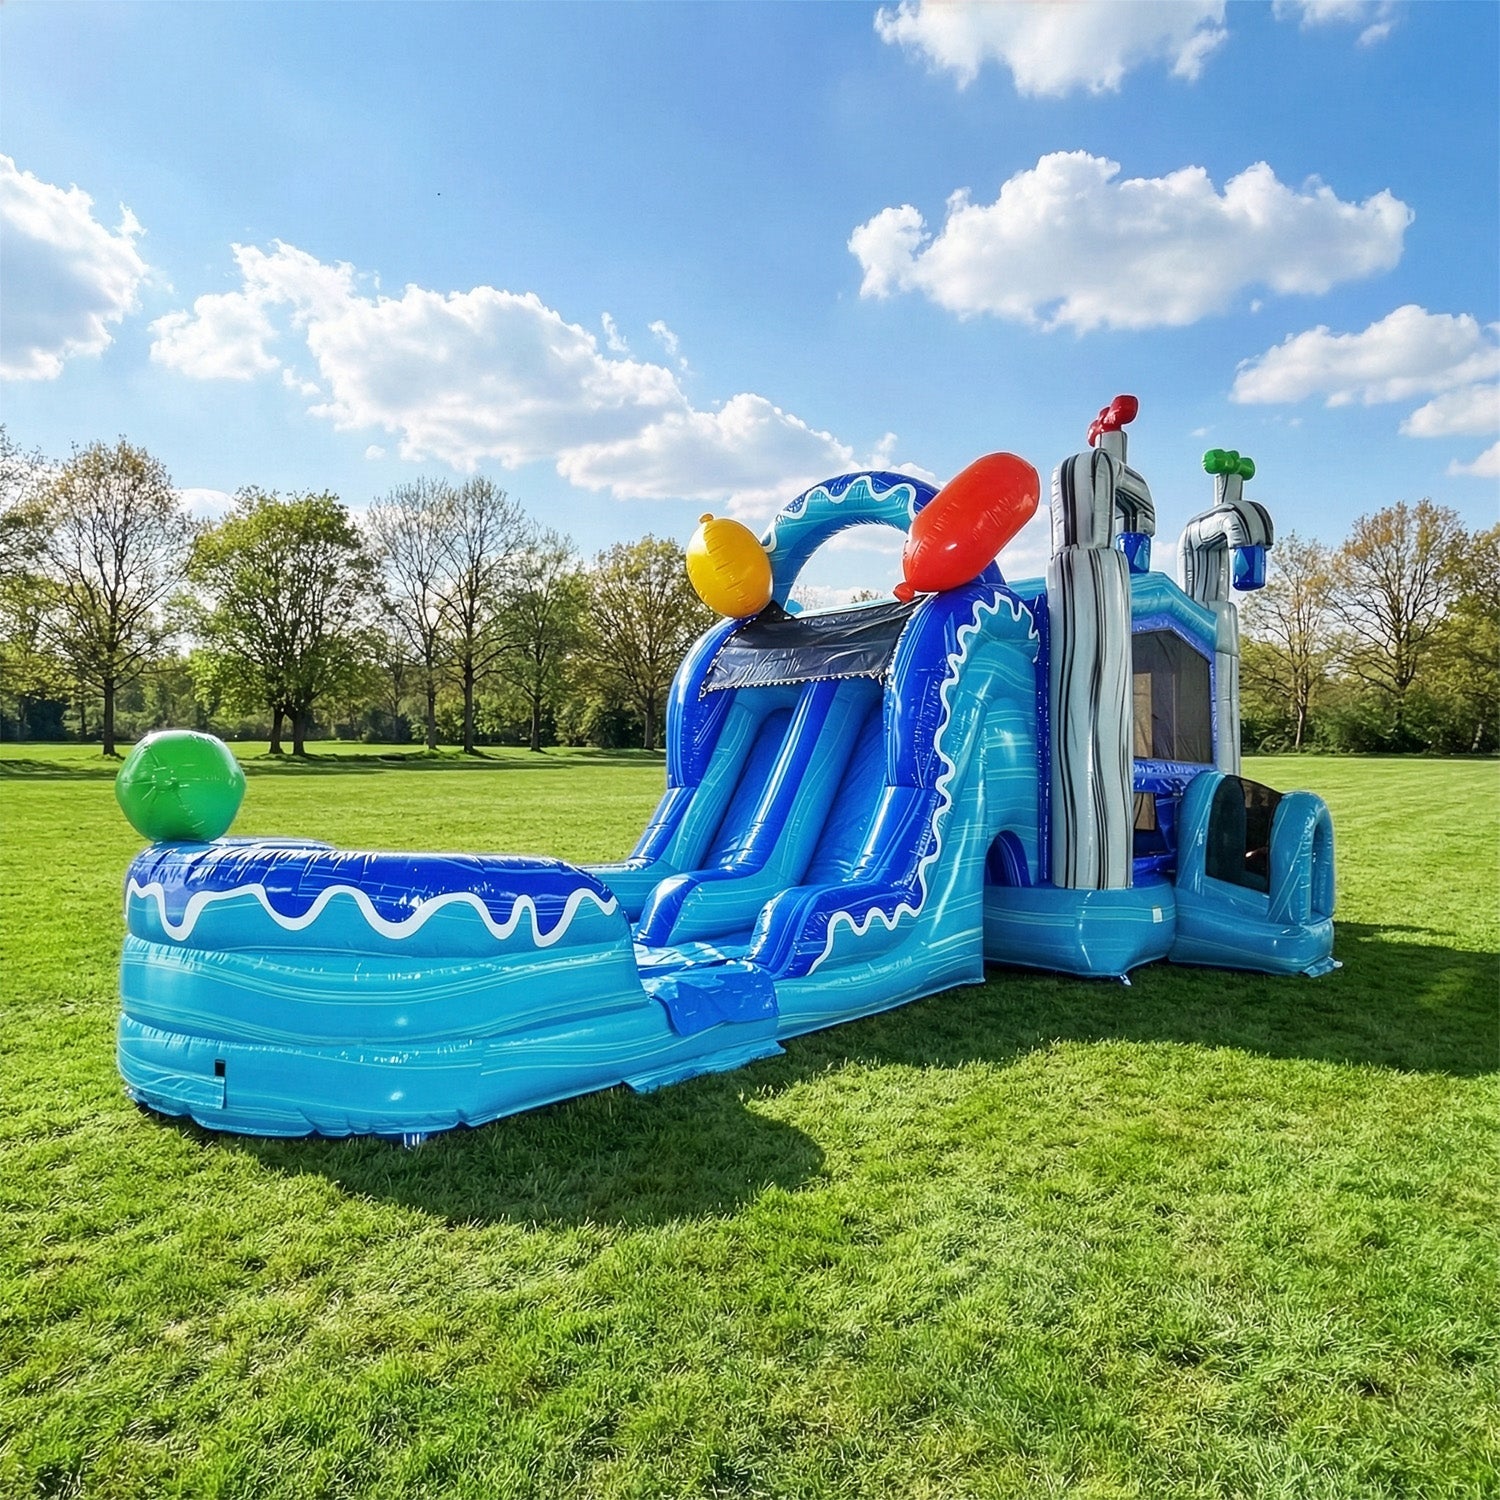
Installation is not just inflation. A complete setup runs from the moment the truck arrives through site assessment, positioning, anchoring, water connection, and final safety inspection before any child touches the slide.
What defines a complete water slide installation from arrival to ready-to-use?
Ready-to-use means the unit is inflated, anchored, connected to water, inspected, and handed off with a safety brief. Inflation alone does not count.
Why is proper installation critical for safety, performance, and customer trust?
A unit that looks right but is under-anchored or improperly positioned is a liability at every event. Clients judge your business by what they see at setup. One bad handoff costs more referrals than any marketing campaign earns.
What risks do first-time operators face if installation is done incorrectly?
Significant ones. Costly material damage from improper setup and maintenance affects 65% of inflatable rental businesses annually. Equipment failure during an event is not just a customer service problem. It is a safety incident and a reputation loss you cannot recover from easily.
What Should You Check Before Installing a Water Slide at a Customer Location?
The most common on-site delays come from missing information you could have confirmed before leaving the warehouse. Pre-arrival verification is not optional.
Is the setup area large enough, level enough, and free of obstacles?
Call the client the morning of the event. Confirm yard dimensions, surface type, gate width, and whether the area is clear. Professional crews complete site assessment in 1 minute on arrival. Inexperienced operators average 5 minutes because they are solving problems that a phone call would have prevented.
Do you have the correct power source, blower, and water access ready?
Electrical connections must use a dedicated GFCI-protected circuit with outdoor-rated extension cords no longer than 100 feet, kept away from all water sources. Confirm the outlet location and cord routing before you arrive. Discovering a missing GFCI on a wet-surface job is a setup-ending problem.
Should you inspect the inflatable, seams, and accessories before setup?
Yes, before the truck leaves. Walk the unit, check all seams, confirm protective netting is intact, and verify that all safety features including no-jump tops are in place. Finding a torn seam at a client location with kids waiting is avoidable. Check at the warehouse. Browse commercial water slides built with commercial-grade seams that hold up from day one.
Can surface type affect how you install and secure the slide?
Yes, completely. Metal stakes anchor on grass. Sandbags anchor on concrete or hard indoor surfaces. Surface type determines which kit goes on the truck. Operators who do not verify this before departure cannot install safely on arrival.
What Equipment and Setup Essentials Do You Need Before You Begin?
Every delivery should leave the warehouse with a complete, verified kit. Missing one item on-site means improvising, and improvising during installation creates risk.
What tools and accessories should always be included with every delivery?
Anchor kit, ground tarp, extension cord, blower, and hose adapter at minimum. Pre-staged anchor kits reduce setup time by 8% and generate 0.2 additional rentals per day. Small gain per event, significant gain across a full season.
What safety components must be confirmed before inflation starts?
Commercial blowers range from 1 to 3 HP and 700 to 1,800 CFM. The blower must sit on a stable, flat surface within 50 feet of the power source. Confirm these conditions before you open a single zipper.
How does equipment quality impact ease of setup and long-term reliability?
Meaningfully. Commercial 15 oz vinyl is 12 to 14% lighter than standard 18 oz material, enabling single-person setup on smaller units. Lighter material reduces physical strain across a full day of deliveries. If you are evaluating your first unit, the startup collection is a practical starting point for commercial-grade equipment designed for solo operators.
What Are the Main Steps to Install a Water Slide Correctly?
A fixed sequence removes guesswork and produces consistent results. Run these steps in order on every job.
How do you unload and position the water slide properly at the start?
Load vertically in the truck and use a dolly to move the unit directly to the setup location. Professional crews unload in 3 minutes. Inexperienced operators average 7 minutes. The gap is entirely logistics, not effort.
How do you unfold and align the slide for correct setup?
Lay a heavy-duty protective tarp before positioning the unit. Orient the unit on the first placement. Repositioning an inflatable after it has partially filled costs time and can stress seams. Tarp and positioning takes professionals 2 minutes and inexperienced operators 5 minutes. The difference is knowing exactly where the unit goes before it leaves the truck.
How do you connect the blower and begin inflation safely?
Tool-free strap and buckle systems reduce blower assembly from 10 to 15 minutes down to 1 to 2 minutes. Professional crews complete blower connection in 1 minute. Inexperienced operators average 5 minutes. Keep all deflation zippers closed before starting the blower.
How do you anchor the water slide securely after inflation?
Anchoring is the largest time gap in the entire process. Professionals finish in 3 minutes. Inexperienced operators average 8 minutes. Anchor kits must be pre-staged and within arm's reach when inflation begins. Anchoring after full inflation is harder and less precise than anchoring during the final inflation stage.
How do you connect the water source and activate the system?
Quick-seal valves reduce water hose connection time from 15 minutes to 5 minutes. Turn the water on at low pressure first to test the spray bar before increasing to operating level. Confirm even water flow across the full slide surface before handoff.
How do you complete a final inspection before customer use?
Walk the full perimeter. Check all seams, tug every anchor point, test water flow, and confirm the blower is running at full pressure. Professional crews complete inflation and final check in 3 minutes. Inexperienced operators average 7 minutes. This stage has zero shortcuts.
How Do You Position a Water Slide for Safe Use and Smooth Operation?
Placement determines the safety profile of the entire event. Get it right on the first decision.
How much space should surround the slide for safety and access?
Water slide installations require a minimum of 5 feet of clearance on all sides and a check for overhead obstructions before the unit is unrolled. Measure before you position. Moving a slide after inflation wastes time and stresses the material.
Should the slide face a specific direction for better performance?
Orient the exit and splash zone toward the open lawn. Afternoon events benefit from positioning the climbing section away from direct sun glare. Confirm the runoff path drains away from the blower and all electrical connections.
How do you avoid placing the slide near hazards like fences or hard surfaces?
Inflatables must be deflated and removed from operation if wind speeds exceed 15 mph or during rain. A unit positioned near trees or structures creates unpredictable wind exposure. Position in the most open area available and always know your exit plan if weather changes.
How Do You Anchor a Water Slide on Different Surface Types?
Anchoring method is determined by surface type. There is no universal approach.
What is the correct method for anchoring on grass?
Stakes must be a minimum of 24 inches for units under 15 feet tall and a minimum of 40 inches for units over 15 feet tall. Drive them at the designated anchor points marked on the unit, not wherever is convenient.
Can you install a water slide safely on concrete or hard surfaces?
Yes, with sandbags. On hard surfaces, sandbags must provide 200 to 300 lbs per anchor point. Confirm the sandbag count and weight before the truck loads. For operators expanding into large events on hard surfaces, sandbag capacity becomes a logistics planning factor on every job.
When should you use alternative anchoring methods like sandbags?
Any time stakes cannot be driven into the surface. A minimum of 150 lbs of anchor weight is required at most anchor points regardless of surface type. Confirm this spec in the pre-departure kit check, not on arrival.
What anchoring mistakes create the highest safety risks?
Under-anchored units on soft ground after rain, stakes too short for the unit height, and sandbag weight underestimated on hard surfaces. All three are preventable with confirmed specs before departure.
How Do You Set Up and Manage the Water Flow Properly?
Water flow setup is unique to slide installation. It requires its own verification sequence.
What should you check before connecting the hose?
Confirm the hose bib is accessible, the hose length reaches the connection point without tension, and the water is off before connecting. A pressure surge at connection can damage the spray bar fitting.
How much water flow is needed for proper slide performance?
Start at minimum pressure, verify even distribution across the spray bar, then increase gradually to operating level. Even coverage across the full slide surface is the target, not maximum pressure.
How do you test splash zones and runoff before use?
Run the system for 60 seconds before handoff. Confirm the splash pool fills evenly, no dry spots exist on the slide surface, and runoff drains away from the blower and all electrical connections. Understanding how wet and dry settings work helps you advise clients on which setup fits their event.
What should you do if the water pressure is too low or too high?
Low pressure: check for hose kinks, confirm the bib valve is fully open, and check the connection seal. High pressure: reduce at the bib, not the nozzle. Never leave a unit unsupervised during the pressure test.
What Safety Checks Should You Complete Before the Slide Is Used?
The pre-use inspection is the final gate before the client takes over.
Should you recheck blower stability, inflation, and anchor points?
Yes. Extension cords must be 12-gauge or thicker, outdoor-rated, and no longer than 50 feet, running to a dedicated 20-amp GFCI outlet. Physically confirm the cord connection during the pre-use walk. Do not assume it is correct because it looked correct during setup.
How do you identify unsafe areas like loose sections or slippery zones?
Look for partial deflation at seams, pooling water near the base traveling toward the blower, and any anchor stake that has shifted since inflation. Address each before handoff.
What rules should you explain to customers before use begins?
Cover weight limits, footwear rules, climbing restrictions, and adult supervision requirements. A 60-second verbal brief sets clear expectations and reduces your liability exposure at every event.
Can a quick walkthrough reduce complaints and liability risks?
Yes. A witnessed handoff where the client acknowledges the safety brief closes the installation professionally and reduces the most common triggers for post-event complaints.
What Mistakes Do First-Time Rental Operators Make During Installation?
Most installation errors are preparation failures, not technical failures.
Do operators lose time by skipping site checks before unloading?
Yes. A blocked blower air intake caused by dirt or debris at the placement location restricts airflow and can cause overheating and blower failure during an event. A site walk before unloading takes 60 seconds and prevents it.
Does poor organization slow down setup and increase errors?
Significantly. Pre-event preparation takes inexperienced operators 8 minutes compared to 2 minutes for a professional crew. That 6-minute gap is generated entirely before the truck arrives, from disorganized loading and missing accessories.
Can incorrect placement create safety and performance issues?
Yes. Every positioning error that requires correction on-site adds time and creates visible disorganization in front of the client. Slow, disorganized placement signals amateur operation to everyone watching.
Are low-quality or worn components a common cause of problems?
Yes. Equipment stored without proper drying and folding averages only 2.5 years of lifespan with a 90% mildew risk. Degraded units fight you at every stage of installation and create handling problems that a newer operator is not equipped to manage efficiently.
How Can First-Time Operators Make Installation Faster and Easier?
Speed is a learnable outcome of preparation and equipment, not rushing.
Can pre-loading and organizing equipment reduce setup time?
Yes. Pre-rolled packing delivers an 18% time reduction and 0.5 additional rentals per day. Loading in reverse delivery order adds another 12% reduction and 0.3 additional rentals per day. Both cost nothing to implement.
How does following a repeatable setup process improve efficiency?
Pre-site assessment alone delivers a 10% time reduction and 0.3 additional rentals per day. Confirming site conditions before departure eliminates the most common source of on-site delays before they happen.
Should you practice installation before your first real booking?
Yes. Run a full dry installation in your own yard with a timer. Unload, position, inflate, anchor, connect water, inspect, deflate, dry, and pack. The first run should not happen at a client's event.
How can better equipment reduce setup time and maintenance effort?
Quick-seal blower valves deliver a 25% time reduction and 0.7 additional rentals per day, the single largest gain from any individual upgrade. Design-optimized commercial equipment reduces setup from 20 to 30 minutes down to 6 to 10 minutes per deployment.
What Should You Do After Installation to Protect the Slide and Your Business?
Post-event handling determines how long the equipment lasts and what condition it is in for the next booking.
Should you monitor the unit during the rental period?
Yes. A mid-rental check takes two minutes. Confirm inflation pressure is holding, anchors have not shifted, and water flow is functioning. It prevents the scenarios that generate complaint calls.
What checks should you perform before takedown begins?
Turn off the water supply first. Use a bilge pump to remove 95% of residual water from the slide within 15 to 20 minutes. Deflation takes 8 to 15 minutes for most units. Starting takedown on a unit still holding water is the fastest way to create a mildew problem.
How do cleaning and drying impact long-term durability?
Significantly. High-moisture zones including pool liners and velcro connection areas retain 70% more water than other sections. Run a blower for 4 to 6 hours during the initial drying phase and rotate the unit every 2 to 3 hours for even drying. Proper folding after full drying is equally critical. Follow a proven folding protocol to protect the vinyl and seams between events.
Why does proper post-event handling reduce repair costs?
Professional drying extends equipment lifespan by 40%. Operators using the full protocol of drying, correct folding, regular repairs, and proper storage average 9.0 years of equipment life with only a 5% mildew risk. That is the difference between replacing a unit in year three and still running it profitably in year nine.
How Can You Build a Repeatable Water Slide Installation System?
One successful installation proves it works. A repeatable system proves it is a business.
What should be included in a standard setup checklist?
Cover pre-departure kit verification, site confirmation call, surface and clearance check, inflation sequence, anchoring spec, water connection test, safety inspection, post-event deflation, drying protocol, and storage conditions. Storage requires maintaining 60 to 75°F with humidity below 50%. Overnight drying before storage takes 6 to 8 hours under optimal conditions.
How do you train helpers or staff to follow the same process?
Assign roles before arrival. One person handles inflation, the other handles anchoring. Crew role assignment delivers a 15% time reduction and 0.4 additional rentals per day. Train on the sequence first, then speed follows naturally.
How do you track and improve installation speed over time?
Time every setup with a phone timer. Log the total and note which stage ran long. Fix one bottleneck per month. By peak season, the cumulative improvement produces a meaningfully faster and more profitable operation.
Your Next Booking Deserves a Setup You Are Proud Of
When all optimizations are combined, pre-rolled packing, correct loading, quick-seal valves, defined crew roles, pre-site assessment, and pre-staged anchor kits, the total result is a 67% setup time reduction and 2.0 additional rentals per day. That is not a marginal improvement. That is the difference between a chaotic first season and a business that scales.
JumpOrange builds commercial water slides designed for exactly this kind of operation: fast to deploy, built to last, and backed by people who understand the rental business. If you are ready to invest in equipment that works as hard as you do, get one-on-one product advice and find the right unit for your market before your next booking.
Leave a comment
This site is protected by hCaptcha and the hCaptcha Privacy Policy and Terms of Service apply.